Welcome

Here you will find delicious, usually healthy and always vegetarian goodies fresh from my kitchen. Enjoy and let me know what you think.

Thursday, November 29, 2012

Pumpkin Wontons


This is a perfect addition to any meal.  A good for you dessert with pumpkin and not too much sweetness.

1 C. canned pumpkin
1/2 C. softened cream cheese
2 T. brown sugar
1 T. pumpkin pie spice
1 egg white for an egg white wash
wonton wrappers
water
powdered sugar

  1. Preheat oven to 350 F
  2. Mix first 4 ingredients until thoroughly combined.
  3. In each wonton wrapper add about 1 to 2 teaspoons of the pumpkin/cream cheese mixture in the center of each wrapper (not too much to have the filling spill out when the wrappers are folded over. 
  4. On 2 sides of each filled wonton wrapper, brush the sides with water and fold over.  Press the sides together until they stick.
  5. Spray a baking pan and place filled wonton wrappers on the pan. 
  6. Brush the egg whites onto each filled and folded wonton.
  7. Bake for 10-15 minutes or until the edges start to brown.  
  8. Remove from oven, dust with powdered sugar and enjoy.  
  9. Caution will be hot, but they are best served fresh!

Inspiration courtesy of: http://www.pinkbasil.com/baked-pumpkin-wontons/

Friday, November 9, 2012

Chilean Charquican


I am missing my time that I spent in South America...the people, the food, the freedom, just to name a few...So, what better way to help solve that problem/make it worse  :P than to cook one of my favorite dishes from down there!

Just a little background...Charqui is a form of a dry meat that Chileans used in the dish.  (I used tofu in mine, so don't worry, I am sticking to my roots) Before I go too much into the background, check out this site which has a great explanation of the dish and where I got a memory kick for remembering how my host mom cooked the dish.

http://eatingchile.blogspot.com/2009/06/charquican-tomatican-and-other-cans_11.html

Charquican

Serves 3

1/2 onion diced
1 T. oil
1/4 block tofu cubed
1 medium potato cooked and cubed
1 15 oz can peas
1 C. corn
1/2 - 1 can pumpkin puree
1 t. salt (more or less according to flavor)
1 small roasted green chili chopped (for a bit of an american flare with some spice)
1 t. ground cumin
1 t. ground pepper
1 t. dried oregano


  1. In a large frying pan, heat the oil.  Add the diced onion and saute until translucent.
  2. (The original recipe calls for carrots...I forgot to add them, so in this step you could saute a chopped medium carrot with the onion)
  3. Add the cubed tofu and continue to saute until the tofu starts to brown.
  4. Add the peas, corn, and pumpkin puree.  Stir to combine and heat until warm.
  5. Add the salt, chili, cumin, and pepper.  Stir until thoroughly combined.  Continue to cook until everything is HOT!

Serve with fresh bread and enjoy!

Wednesday, November 7, 2012

Roasted Butternut Squash and Quinoa


Welcome to fall!  I do already miss summer, but according to Colorado's forecast, it is supposed to be in the 70s today, so I guess I can't really say I miss summer when it has not really left.  But, I do love fall as well, especially with all the delicious winter squash varieties that I get to experiment with!  This dish was inspired by some leftover butternut squash (when cooking for 1 person, even with how much I eat, you would be surprised how long 1 squash will last!)

Roasted Butternut Squash and Quinoa
Serves 3-4

1.5 C. semi-cooked and cubed butternut squash to soften and make the roasting process faster
1 medium carrot cubed
4-5 oz. tofu cubed
1.5 C. cooked quinoa (could use rice, but quinoa is so much better for you)
1 small fire roasted chili (optional)
1 T. oil
1 t. fresh ground pepper
1 t. cinnamon
1 t. ginger
1/4 c. slivered almonds
1 small packet honey
2 leaves collard greens or kale chopped into pieces (kale  is preferred, but the greens were so much cheaper at the time)


  1. Preheat the oven to 350 F
  2. In a greased baking dish, place cubed butternut squash, cubed carrot, and cubed tofu.
  3. Sprinkle on chili, pepper, cinnamon, and ginger.
  4. Toss to evenly coat the ingredients with the spices.
  5. Roast/Bake for 30-45 minutes or until the squash and carrot are soft and and roasted to almost your preference.
  6. Remove from oven, mix in honey and slivered almonds.
  7. Mix in chopped collard greens
  8. Place back in the oven and cook for an additional 10-20 minutes or until collard greens start to become crunch up, but not burn.
  9. Remove from oven.
  10. To serve, place 1/3 of the cooked quinoa in a bowl and top with the roasted mixture.
  11. Enjoy!!!

Saturday, October 13, 2012

Spicy Carrots and Beets


I have been trying all summer and fall to get my beets to grow.  I planted them mid spring in hopes that I would have decent size beets to use in my fall recipes.  I watered them (well, my parents did most of the time because I kept forgetting about them), but that is beside the point...they got watered, except for the week of evacuation, but they survived.  Well, needless to say, 6 months later I ended up with some beets...the size of these said beets might be a joke...I pulled up one that was a whopping .5 inch diameter...another one fared a bit better and got to 1 inch in diameter.  Not the size I was hoping for, but still edible...not sure I am cut out to be a beet farmer.  I might just have to support my local farmer's market more.  I was still determined to use MY beets in this recipe, so the version I made was heavy on the carrots and onions and light on the beets (and a bit spicier than I had intended).  I am going to post the version I made and then I have provided the link for my inspiration at the bottom if you want the full fledged version.

Serves 2 with rice on the side

3 itty bitty beets boiled and sliced and diced
1 big carrot sliced
1 medium onion diced
1 t. oil for sauteing
1 t. garlic powder
2 green chilies diced
1 to 2 t. curry
1/4 t. chili powder
1/4 t. salt
1/3 C. coconut water + 2 T. powdered milk =my version of coconut milk

  1. In a medium pan, heat the oil on medium.
  2. Add the onions ad saute until translucent.
  3. Add the garlic, curry, chili powder and salt, stir
  4. Add the carrots, beets and green chilies.  Stir and cook until the carrots are tender to your liking.
  5. Add the coconut water/milk concoction and stir.  
  6. Serve over rice (brown rice is preferred if you remember to start cooking it right before you begin sauteing everything
Enjoy!!!!


Inspiration courtesy of:http://www.onetribegourmet.com/2012/02/spicy-beets-carrot-curry-in-coconut-milk/

Saturday, October 6, 2012

Zucchini Fritters


Zucchini Fritters with Tzatziki

Serves 2, Yield=6
2 cups coarsely grated zucchini
1/2 cup coarsely grated potato
kosher salt
pinch of flour
1 egg
1 tablespoon chopped chives (or whatever herb you like)
1 tablespoon chopped mint (or whatever herb you like)
zest of one lemon
1/4 cup diced white onion
1 tablespoon unsalted butter
Tzatziki:
1 cup Greek yogurt
2 T. finely diced red onion
1 T. chopped mint
kosher salt
squeeze of lemon juice
1. Place the grated zucchini and potato in a colander. Spread the veggies out to allow for maximum surface area exposure and sprinkle all over with kosher salt. Let sit for at least 30 minutes to drain.
2. Meanwhile, make the tzatziki, if desired: Stir together yogurt, onion, mint, salt and lemon juice. Taste. Add more salt if necessary. Chill until ready to use.
3. After the 30 minutes, squeeze veggies out and wrap in paper towels. Squeeze again. [Note: The veggies will not drain out enough liquid on their own in the collander, so squeezing them with a paper towel is a critical step to mopping up that moisture.] Open up the paper towel and spread out your veggies. Sprinkle with a pinch of flour to soak up leftover moisture.
4. In a bowl, whisk together egg, herbs and lemon zest. Add salt and pepper to taste. Add onion and grated zucchini-potato mixture. Stir well.
5. Preheat over to 200˚F. Place a foil-lined cookie sheet in the oven. Heat a large skillet over medium-high heat. Melt 1 tablespoon of butter. When foam subsides, drop a spoonful of your fritter batter in. Gently pat with a spatula to flatten out the fritters, which will help make them crispy.
6. Cook about 3 fritters at a time until golden brown on each side. Place fritters in the oven while you make additional pancakes. Serve as soon as possible with tzatziki on the side.

Easy Oatmeal Banana Bars


Answer: School got in the way.  Question: Where I have been the last few months?  Have I still been eating?...yes.  Have I been cooking as much?...no  However, what I do cook now tends to be super quick, though I am usually starved by the time it is done that there are not pictures for proof that I made something. And, I usually don't measure what I put into each dish, so it makes it even harder to try to write a recipe for someone  :P

I did manage to make these easy oatmeal banana bars, and actually have a recipe for them (though I tend to not follow it now and just start dumping ingredients into a bowl).

What you will need: (serves 1-2)

1 very ripe banana
1/3 C. Milk of your choosing
2/3 C. Oats
1 egg 
1/4 t. vanilla
1/4 t. cinnamon
1/4 t. baking soda
3 T. raisins, dried fruit, coconut, chocolate chips and/or almonds (optional)

Preheat oven to 325 F.

Mix all ingredients in a bowl until thoroughly combined.

Pour into greased muffin pans or small baking pan.  I used a mini spring-form pan to get the round shape

Bake for 10-20 minutes or until toothpick inserted comes out clean. (Again, here is my lack of actually watching what I do, so just monitor your bars/muffins to make sure they don't burn).

Enjoy!

Sunday, July 8, 2012

Zucchini Tots


And again, more Zucchini.  This zucchini happens to come from what was left of my zucchini for the Zucchini 'Bread' Oatmeal.  These tots are super easy, better for you than tater tots and super delicious...I did not get a better picture because they were devoured before they really came out of the oven.  I won't continue to bore you with my zucchini stories, but I can tell you, if you find a great deal on zucchini, buy it.  It is so versatile and delicious!

Zucchini Tots

  • 1 C. grated zucchini
  • 1 egg
  • 1/4 onion, diced
  • 1/4 C. grated cheese of your choice
  • 1/4 C. bread crumbs
  • salt and pepper to taste
  1. Preheat oven to 400 F. 
  2. Grate the zucchini and then place on a dish towel.  Use this towel to wring out ALL the excess water that is naturally in the zucchini.  (If this step is skipped, the middle of the tots will be 'soggy' while the outside will be crispy, which kind of defeats having a 'tot').
  3. In a medium sized bowl, combine all ingredients and stir until well mixed.
  4. Spray mini-muffin pan with non-stick spray.
  5. Spoon batter into the pan and press the batter down into each pan to make sure the batter will cook together and the tot will come out in one piece.
  6. Bake in oven for 15-18 minutes or until the top is browned and set.
  7. Remove from pan.  If the tots are sticking, use a plastic knife and slide it around the outside edge of each tot to loosen it from the pan.

Zucchini 'Bread' Oatmeal


ZUCCHINI!!!!  That is really going to sum up the next few posts of mine...I went to the farmer's market the other day, right after going for a beautiful, though a bit longer than I had planned run in Garden of the Gods and of course found zucchini super cheap.  One of the great things about zucchini is that it does not really have a distinct taste, and kind of like tofu, picks up the flavors that it is cooked with, so oddly enough, like zucchini bread, you do not taste the zucchini in the oatmeal.  So, to not bore you with anything else about zucchini...

Zucchini 'Bread' Oatmeal

  • 1/2 C. instant oats
  • 1/2 C. water
  • 1/2 C. grated zucchini
  • 2 T. favorite protein powder (optional)
  • 1/2 t. cinnamon
  • (optional) sprinkle of raisins, cinnamon, granola, almond butter, etc...
  1. I a microwave safe bowl, combine the oats, water, grated zucchini, protein powder and cinnamon.  
  2. Stir thoroughly.
  3. Microwave on high for 1-2 minutes until oatmeal is steaming hot.  Watch carefully to make sure there is enough water in the bowl.  (The amount of water varies due to adding the zucchini, which adds its own liquid to the recipe) If oatmeal starts to thicken too much, add more water, stir and continue cooking until hot and desired consistency is reached. 
  4. Top with your favorite optional toppings and enjoy.

Friday, July 6, 2012

Cornmeal Waffles with Salsa and Eggs


It has been some time since the last post...life...well, nature kind of got in the way on this one, and not always  nature in a good way.  My family included 4 of the 32,000 people evacuated in Colorado Springs due to the Waldo Canyon Fire, and then at the end 4 of the 3,000 people still evacuated due to the destruction of the fire.  Fortunately, we are back in our house with little to no damage done to our house save a little smokey/campfire smell that is lingering, a bit of ash near the windows and doors of the house, 2 dead echinacea plants and 1 dead cilantro plant.  After 346 homes being lost in the Mountain Shadows neighborhood, I am excited to say that that is our biggest problem...unfortunately the same cannot be said about so many wonderful families in the area and my heart goes out to them...if you are one of those families reading this blog, I am truly sorry and please let me know if there is anything I can do for you.

This photo was taken at Coronado High School as the fire jumped the ridge and raced for Mountain Shadows creating the fire storm that swept through the neighborhood.

With all the evacuations and such in place, a big question going around is: if you were to be forced to evacuate with the possibility of your remaining items being destroyed, what would you take with you? Let me know...the answers to that question have been so interesting and though provoking.  

Makes 2-3 waffles

Cornmeal Waffles with Salsa and Eggs


  • 1 C. all-purpose flour
  • 1/2 C. cornmeal
  • 1 1/2 t. baking powder
  • 1 t. sugar
  • 1/2 t. baking soda
  • 1/2 t. salt
  • 1/4 t. freshly ground black pepper
  • 2 T. melted butter
  • 2 T. plain non-fat yogurt
  • 2 large eggs
  • 1 1/4 c. buttermilk
  • 3 T. minced chives
  • 2 T. fresh minced parsley
To serve with waffles (on top)
  • eggs
  • salsa
  • minced chives
  1. In a large bowl, combine all dry ingredients and stir thoroughly.  Add wet ingredients and stir until just combined...don't over mix.
  2. Cook the batter in a waffle maker according to manufacture's instructions
  3. While the waffles are cooking, cook the eggs in a non-stick pan according to your favorite style of eggs.
  4. Serve warm waffles with salsa, cooked egg and freshly minced chives.

Sunday, June 17, 2012

Zucchini Oat Bread


Let me start off by saying, I would love to hear your comments and feedback!  Let me know what you think of the pictures, directions, layout, etc...Good or bad, I really appreciate what you have to say!

Now, the next few posts will most likely be dedicated to ZUCCHINI!!!!  I went to the farmer's market yesterday after a 10k run and found zucchini on sale.  Do now, I have almost more zucchini on my hands than I know what to do with. But no worries, I have many plans in my mind of what I want to cook and bake!  I was going to hold out on buying zucchini and just wait for it to grow in my garden, but I became too impatient...I don't really think I am meant to be a gardener...I planted some seeds the other day, and at that moment,I was ready for them to sprout...stupid 7 to 10 day germination period.  But hey, that is what the farmers market is for!

makes a good amount of muffins or 2 loaves of bread

Zucchini Oat Bread

  • 2 1/2 c. all-purpose flour (or wheat flour...sadly I had run out and really had no desire to go to the store for one item...save on gas...and I still have 2 flat bike tires)
  • 1/2 c. quick oats
  • 1 t. salt
  • 1 t. baking soda
  • 1 t. baking powder
  • 1 T. ground cinnamon
  • 3/4 t. ginger
  • 1/4 t. nutmeg
  • 3 eggs
  • 1/2 c. vegetable oil
  • 1/2 c. applesauce
  • 1 c. white sugar
  • 1 c. brown sugar
  • 1 T. vanilla extract
  • 4 C. grated zucchini (about 1 large zucchini)
optional ingredients to add more character or flavor to your bread...pick and choose to your liking!
  • 1/2 c. chocolate chips
  • 1/2 c. raisins or craisins or your favorite dried fruit
  • 1 c. walnuts
  1. Spray two 8x4 inch pans or start spraying muffin pans.  
  2. Preheat oven to 325 F.
  3. In a large bowl, mix together all ingredients.
  4. Pour batter into prepared pans or muffin tins.
  5. If you are using the 8x4 inch pans bake for 45-55 minutes...If you use muffin pans bake for 25-30 minutes or until inserted toothpick comes out clean

Rosemary Olive Oil Bread


My 2 weeks at Starbucks has been put in!  Actually, it is kind of bitter sweet which I never thought would happen.  I am really excited to be done working there (it has never really been my dream job...go figure), but I am going to miss my coworkers.  But now, I am off to the next phase of life which happens to be grad school at CSU in Fort Collins to get my Master's in Management.  I know that the next year will be super busy and crazy, so I am trying to get all of my crazy cooking out of the way...maybe I am hinting at a future career.  I am also experimenting to try to find recipes that are going to be super quick and easy to prepare but still healthy for the upcoming year.

Makes 1 loaf

Rosemary Olive Oil Bread

  • 1 c. warm water (100 to 110F)
  • 1 T. cane sugar
  • 2 t. active dry yeast
  • 1 t. salt
  • 2 T fresh rosemary, chopped (or 2 tsp. dried)
  • 1/4 t. Italian seasoning (or pinch of each or garlic, dried oregano and dried basil)
  • 1/4 t. freshly ground black pepper
  • 2 T. extra virgin olive oil
  • 11/2 c. whole wheat flour
  • 1/2 c. bread flour + extra for kneading
  • 1 egg whisked + 1 T water for egg wash
  • dried rosemary for sprinkling
  1. In a large bowl, combine the warm water, sugar and yeast.  Let sit 10 minutes to proof
  2. Stir in the salt, rosemary, seasonings, pepper, olive oil, whole wheat flour, and the bread flour.  Stir until the dough forms a ball.  Knead on a lightly floured surface for about 5 minutes, until smooth, adding more flour as necessary to prevent sticking.
  3. Place the dough in a lightly greased bowl, cover and let rise until doubled in size, about 1 hour.
  4. Punch down the dough and form it into a round loaf.  Place it on a cornmeal dusted parchment paper. (critical step...I forgot to place cornmeal on it (meaning I used wax paper, so I had to remove the bread before cooking)...it stuck, and fell a bit) Cover and let rise again until doubled in size, about 45 minutes.
  5. Prepare the egg wash by combining the egg and water, whisking until evenly stirred. 
  6. About 20 minutes before the 45 minutes are up, preheat oven (and pizza stone or baking sheet) to 400 F.  Once the dough has risen, gently brush the top with egg wash and sprinkle with dried rosemary.
  7. Transfer to preheated pizza stone and bake for 20-25 minutes or until the top is golden brown and the bread sounds hollow when tapped.
\

Sunday, June 10, 2012

Cucumber Avocado Spring Rolls


Summer has arrived!  It was 90+ yesterday...not really weather to be doing a whole lot outside, and way too hot to be cooking much.  Which means out comes the delicious raw veggies.  This dish is so easy to prepare and very delicious (I think I say this about all of my cooking, I could be partial).  One of my favorite things about this dish is the dipping sauce that goes with the egg rolls.  I want to make a large portion of it so that I can use it on my salads this summer.

Makes 10 rolls

Cucumber Avocado Springs Rolls

  • 1 T lemon juice
  • 2 T. oil
  • 1/2 t. Dijon mustard
  • 1/2 t. soy sauce
  • 1 t. brown sugar
  • 2 avocados
  • 20 rice paper rounds- 6 or 8 inches in diameter
  • 10 green lettuce leaves
  • leaves from 1 bunch fresh basil
  • leaves from 1 bunch fresh mint
  • 2 carrots shredded
  • 1/2 cucumber, cut into thin strips

  1. In a small bowl, stir together lemon juice, oil, Dijon mustard, soy sauce, and brown sugar until the brown sugar dissolves.  Set aside for later use!
  2. Halve, pit and peel the avocados.  Slice into 1/2 inch cubes.
  3. Fill a wide shallow bowl with warm water and lay a clean kitchen towel next to the bowl.  
  4. Dip 1 rice paper in the warm water and let soften in the water for a few seconds.  Remove from the water and lay it on the towel.  Repeat with a second rice paper and place directly on top of the first rice paper.  
  5. Center a leaf lettuce on the stacked rice papers.  Starting about 1/3 in from the edge closest to you, place a few basil and mint leaves on the lettuce.  Top with a small row of each the shredded carrots, sliced cucumber and diced avocado taking special care not to overstuff the rolls.  Lift the bottom edge of the rice paper up and over the filling and then roll, folding in the sides as you go, rolling into a tight cylinder.  Set aside seam side down.  Repeat with remaining ingredients, making 10 rolls total.
  6. Cut each roll in half and place on a platter with the dipping sauce.  
  7. Serve immediately and enjoy.  
(I did learn from experience trying to make my lunch for the next day, these delicious rolls are to be enjoyed asap...not really the best the next day.  The rice paper rolls tend to dry out and harden, making not the perfect spring roll)


Sweet Potato Cannelloni


I don't know if I have mentioned it, but I have gotten accepted into grad school at CSU!  I am beyond stoked. This however means, that I will not have as much free time for cooking and such, so I am trying to get it all out of my system before I get crazy busy.   And again I love sweet potatoes so much, I just keep cooking with them.  (Did I mention that I turned orange as a little tot because I at so many sweet potatoes.)  This one is perfect for sweet potato lovers: sweet potato puree wrapped in sweet potatoes!  This dish is a bit time consuming, but not very complicated, and totally worth your time.

Sweet Potato Cannelloni

  • 3 medium sweet potatoes (about 1 pound each
  • 3/4 c. low fat cottage cheese
  • 3/4 c. diced apple
  • 3 T. chopped fresh chives
  • 2 ounces Parmesan cheese
  • dash salt
  • ground pepper to taste
  • cooking spray
  • 1 T. oil
  • 1/3 c. chopped toasted walnuts or almonds


  1. Preheat oven to 350 F
  2. Thoroughly cook 1 sweet potato in your choice of cooking.  (I cooked mine in the microwave wrapped in plastic wrap.)
  3. While the sweet potato is cooking, wash and peel the remaining 2 sweet potatoes.  Using a mandoline  thinly slice the sweet potatoes, making about 30 slices in total.  
  4. Bring a large pot of water to boil.  Place half the sliced sweet potatoes in the boiling water.  Cook for 2-3 minutes or until the slices are tender.  Remove the slices from the water and repeat with the other half of the slices.  
  5. Remove the peeling from the whole cooked potato.  Puree the sweet potato with the cottage cheese.  
  6. Move the puree mixture to a bowl and stir in the diced apple, chives, 1 ounce of the Parmesan cheese, salt and pepper.  
  7. Spray a 9x13 inch pan.  
  8. Place 1 heaping tablespponful in the center of each sweet potato slice and roll up.  Place each roll, seam side down in the baking dish. 
  9. Brush the oil over the cannelloni and bake for 10-15 minutes.  Remove from oven and sprinkle with the almonds/walnuts and Parmesan cheese.
Enjoy!

Sunday, May 27, 2012

Vegan and Gluten free Brownie Pancakes


A challenge arose the other day...one of my lovely co-workers is gluten and dairy free, and pregnant, so obviously hungry, so I needed to come up with something delicious and good for her.  After searching for a while I stumbled upon these amazing brownie pancakes.  Besides, who can go wrong with chocolate!? These pancakes were delicious and it took so much will power to not eat the whole batch before I brought them to her  at work!

Brownie Pancakes

  • 1/4 C. + 1 1/2 T Flour of your choice (I obviously used gluten free flour in the ones I baked, but if you are not gluten free, there is no need to spend extra money on that flour)
  • 1/4 t. baking powder
  • 1 T. Hershey's unsweetened cocoa powder
  • 1 T. + 1 t. Sugar (the original recipe called for 1 1/2 packets Stevia or another artificial sweetener, but I like to stay away from all that)
  • Pinch of Salt (optional)
  • 1 1/2 T. Unsweetened Applesauce (I ended up using the same quantity of oil because I ran out of applesauce and had no time to make an emergency store run...obviously the pancakes were not as healthy, but...)
  • 1 t. Vanilla extract
  • 5 1/2 T. non-dairy milk of your choice (or milk if you don't need to go dairy free or vegan...though eliminating a bit of animal products from your diet every so often can be beneficial to your health, so what better way than in some already delicious pancakes where you will not taste the difference!)

  1. Thoroughly mix all the dry ingredients.
  2. Add the wet ingredients and stir well.
  3. Heat skillet to just a notch below medium.
  4. Cook pancakes!
  5. Remove and enjoy plain, with caramel, or your favorite toppings!

Thursday, May 10, 2012

Kale Chips


I have been seeing a lot of posts lately about kale chips being baked in the oven.  After seeing the pictures enough times, I decided to finally cave in and give it a go to see if all the hype was worth it.  They are way healthier than potato chips while at the same time providing that valuable and sometimes necessary salty crunch that we all crave.  So, I headed off to my nearest (and only) Sunflower market to buy a bunch of kale for $1, which surprisingly, after baking it all, made a ton of chips.

The final verdict, they are definitely worth the hype that has been produced about them.  While they don't 'replace' potato chips, they do provide a delicious salty crunch while providing a ton of vitamins and minerals.  I will definitely be making these again.

Kale Chips

1 bunch kale
salt and pepper to taste
splash of oil per batch of chips.

Preheat oven to 250 F.

Wash and dry kale thoroughly.

Remove the kale from the stem and tear into 'chip' size pieces.

Place into a bowl and drizzle with oil.  Add salt and pepper to taste and toss the kale gently until each piece is coated with the oil, salt and pepper.


Place on a cookie sheet, but not too close together or you will steam your kale instead of baking it.

Bake for 5-8 minutes or until slightly brown and crunchy.  Flip and continue to cook kale until crispy.
 

Remove from oven and either let cool and enjoy or eat fresh from the oven!

Black Bean Hummus


I love hummus, but you know, sometimes change is good, so what better way to change things up than change the bean that goes into the hummus that I so dearly love?  So, surprise, black bean hummus!

And without further ado...

Black Bean Hummus

1 15oz. can Black Beans drained
1 clove garlic finely chopped
2 T. lemon juice
1 1/2 T. tahini
3/4 t. ground cumin
1/2 t. salt
1/4 t. cayenne pepper
1/4 t. paprika


In a food processor or blender, add all ingredients and blend until very smooth.  Remove from blender and place in a beautiful serving dish to enjoy your oh so delicious and nutritious black bean hummus with your favorite veggies, chips or pita chips/bread.

Inspiration courtesy of: http://allrecipes.com/recipe/black-bean-hummus/

Sweet Potato and Rhubarb Sauce Pizza


It is only April (remember I live in Colorado) (well, when I started writing this and cooked the pizza) and I already have fruits and veggies sprouting in my garden (alright, my parent's garden, but I like to reap the benefits from it).  There is a ton of rhubarb already in my garden, so I what was I to do.  (Yes, I realize it is green...if you want the real red rhubarb, apparently you need to buy the quality seeds and not the cheap ones, but the green rhubarb is still deliciously tart, you just won't have the signature red to go with the tart goodness).  Sweet Potatoes are also still on sale and I can't seem to get enough of them.  I also found a super easy recipe for homemade flatbread pizza crust in the Gazette newspaper the other day, so all these perfect ingredients were calling my name.  (You can use any pizza crust you like, including the premade kind for this, just follow the cooking directions for the crust that you use)

This recipe does take a bit longer than the others that I have posted, but it is totally worth the wait with the unique flavor combination and the quantity of food that you get out of the cooking process.

Serves 1-2

Sweet Potato and Rhubarb Sauce Pizza

Pizza Crust (Yield 2 large pizzas)
1 C. 6 T. lukewarm Water
3/4 T. Yeast
3/4 T. Salt
1/2 T. Sugar
2 1/2 T. Olive Oil
31/4 C. All Purpose Flour (or a mix of All Purpose Flour and Whole Wheat Flour to make a healthier version)

Rhubarb Sauce

3 C. Rhubarb chopped
1/2 C. Sugar
1 T. Water

Pizza

1/3 of the homemade Pizza Crust
1/4 C. Rhubarb Sauce
1/4 Onion
1/3 Sweet Potato
1/4 C. Shredded Part-Skim Mozzarella Cheese

To Prepare the Pizza Crust


Mix water, yeast, salt, sugar and oil in a large mixing bowl.

Add flour and mix until just combined (do no knead).

Cover and let rest for 2 hours at room temperature. (after this stage the dough can be refrigerated for up to 12 days)

When ready to cook, preheat oven to 425 F.  Pinch off amount of dough desired and form into a pizza shape.  Cover hands with flour because the dough will be sticky.  Add desired toppings and bake until the cheese is melted...about 10 minutes.

To prepare the Rhubarb Sauce

Finely chop the rhubarb.

In a sauce pan on medium high, add the chopped rhubarb, sugar and water.  Cook for 5 minutes or until mushed together.

To prepare the Pizza!


To begin with, cook your sweet potato in the microwave for 5-8 minutes until soft.  Remove from microwave, peel and slice into desired size.

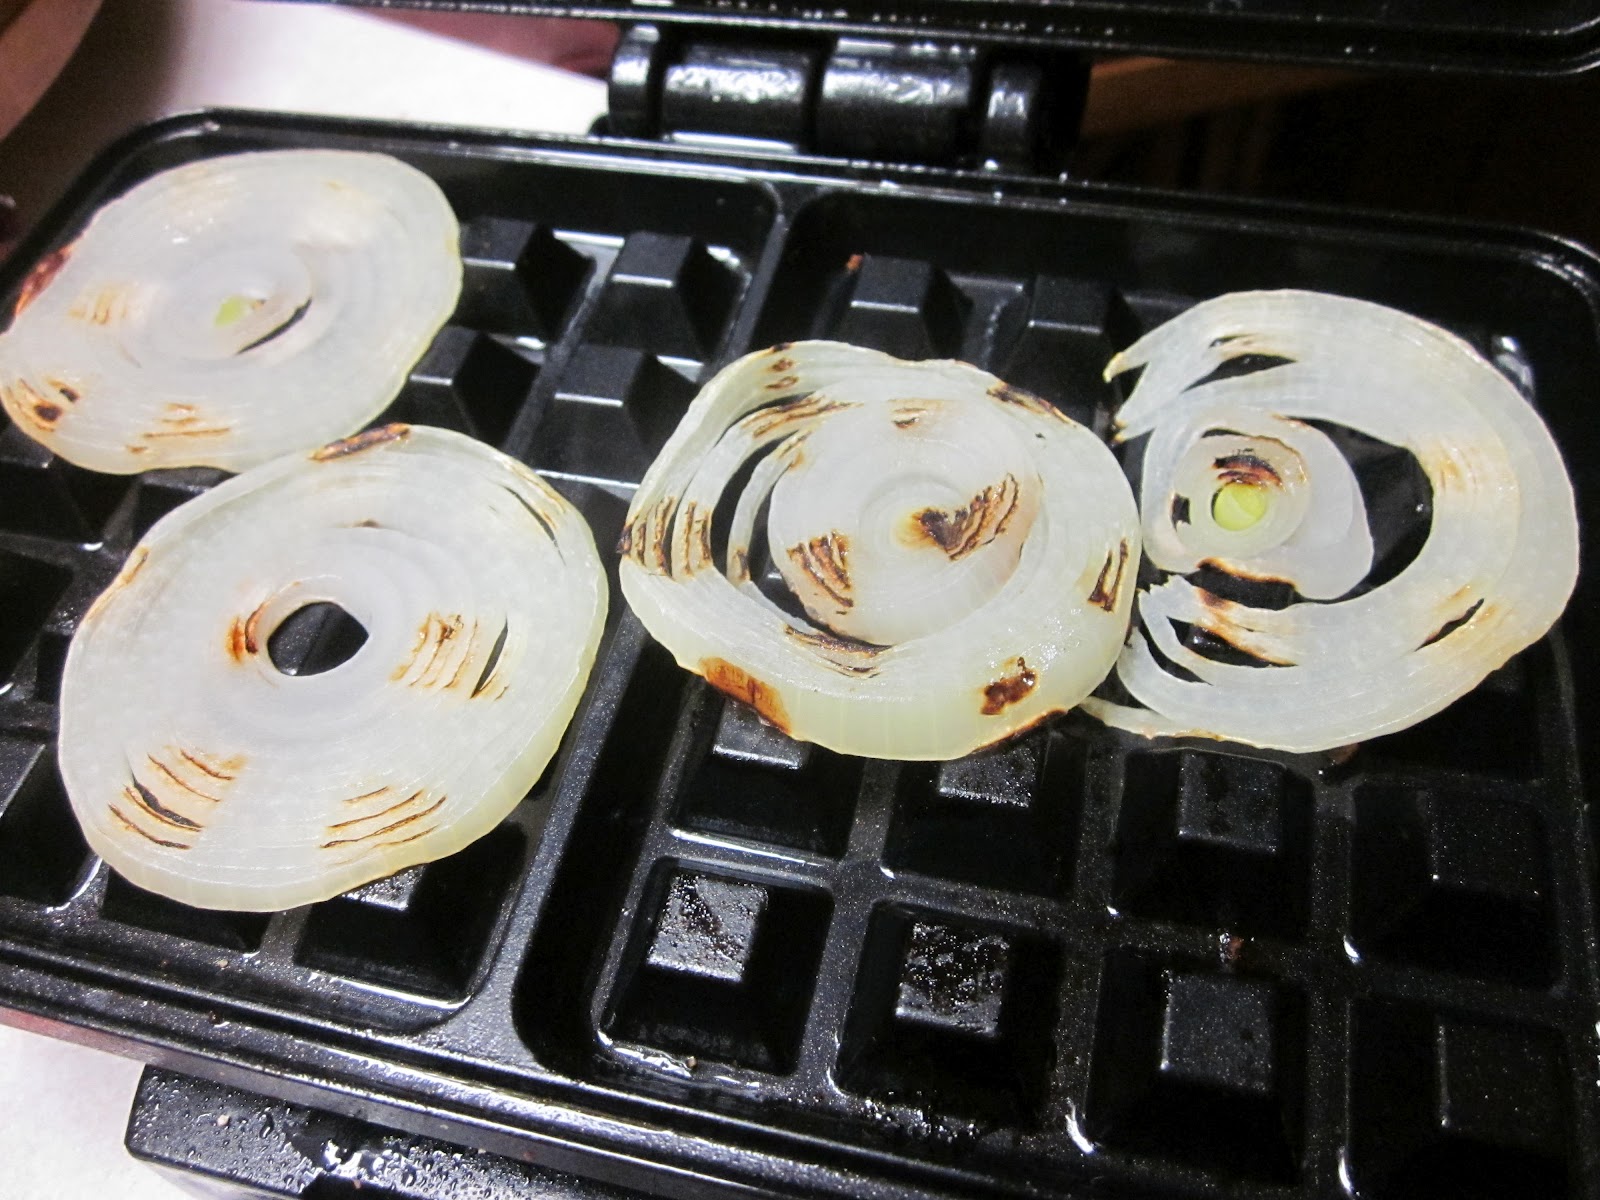
While the sweet potato is cooking, chop up the onion and saute in a pan on medium for 5-7 minutes or until the onion becomes translucent.

Flatten a desired amount of pizza dough for your pizza


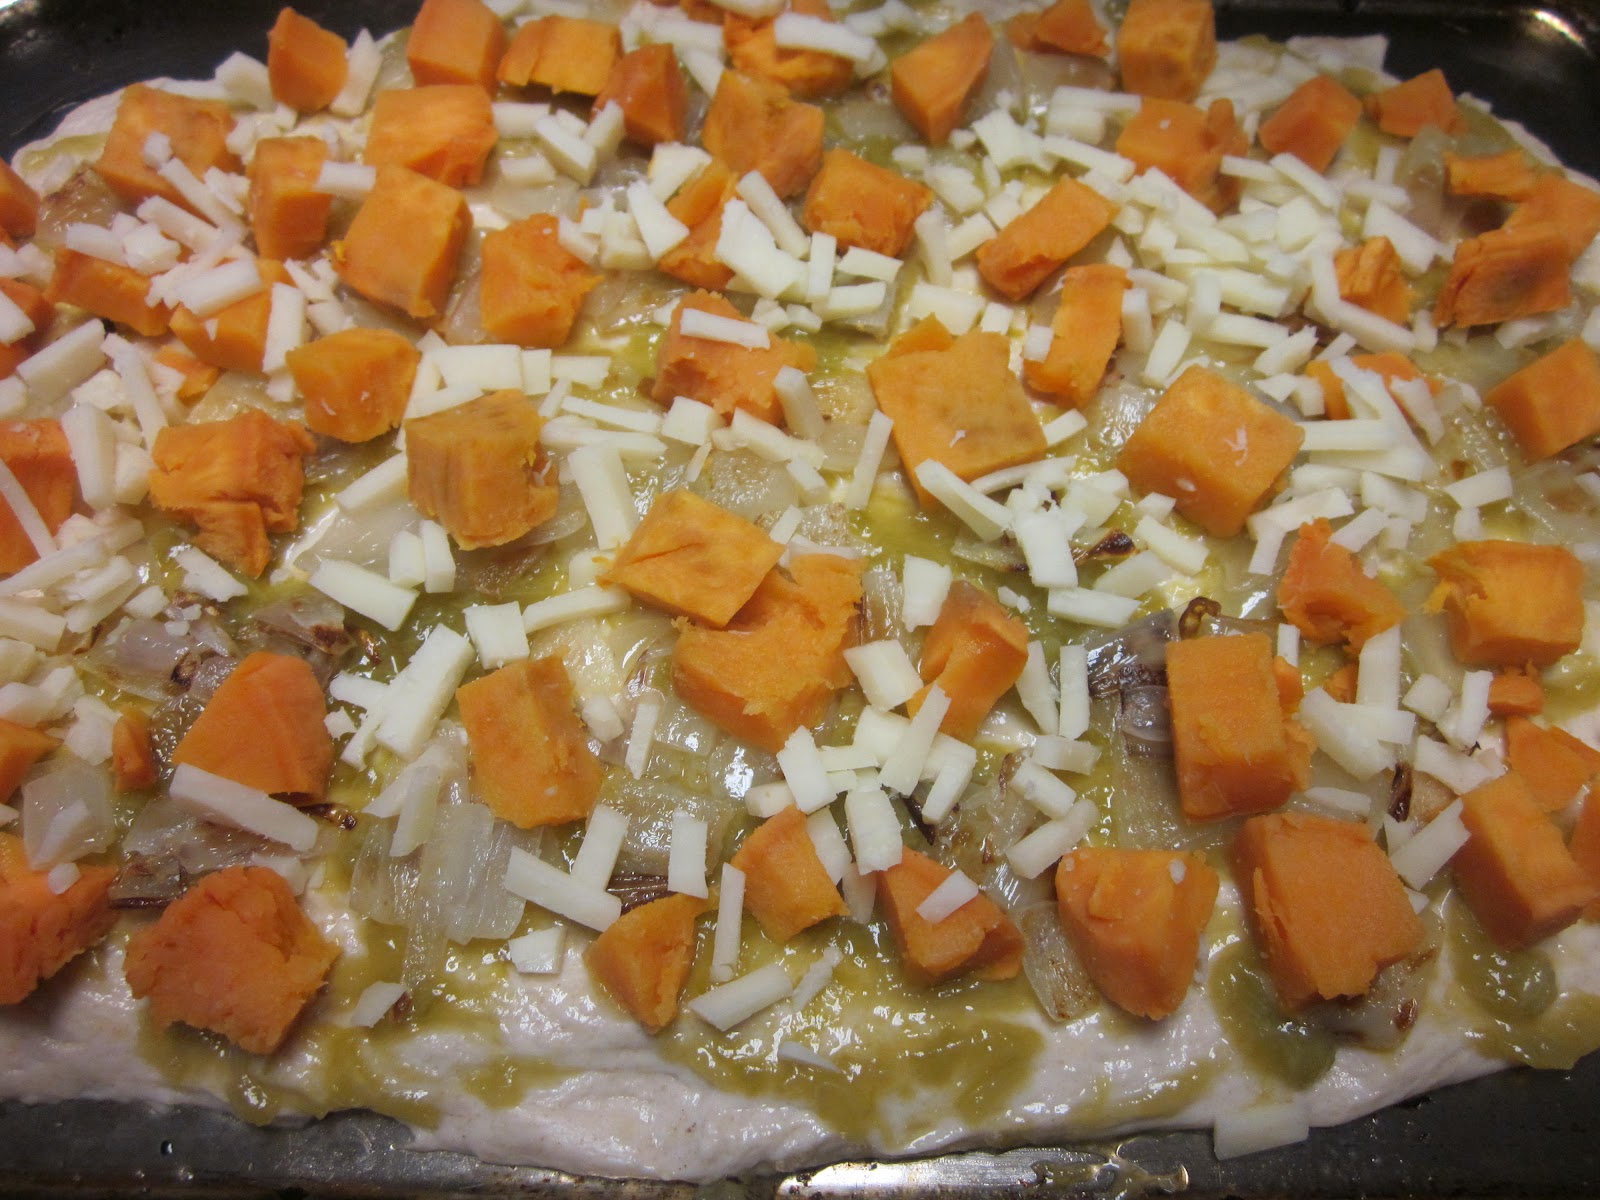
Spread a thin layer of the Rhubarb Sauce on the Pizza Crust.


Add the sauteed onions on top of the sauce.


Add the chopped sweet potatoes and shredded cheese.

Bake at 425 F for 10-12 minutes or until a golden brown crust and the cheese has melted.


Remove from the oven, slice, serve, and enjoy!

Saturday, April 28, 2012

Sweet Potato Quinoa


I love warm weather!  Yesterday was a perfect day, minus the sunburn because I was ouitside the whole day without the sunscreen (bike ride, walk, bike ride, frisbee, walk, and then dinner and reading a book outside).  It was wonderful, but one day I will learn to wear sunscreen.  And a warm day with plenty of exercise calls for a cooler meal, which fortunately, all of the ingredients cooked ahead with leftovers made for a chilled out meal (it is also equally delicious hot, and is prepared the same way, you just use the hot version of the quinoa, sweet potatoes and onions).  So without further ado...

Makes about 2 servings
Sweet Potato Quinoa

1 C. cooked Quinoa
1/2 Cooked Sweet Potato
1/4 Onion chopped
2 T. chopped Almonds
butter for sauteeing the onions
dash of Cinnamon Powder and Ginger Powder fit to your taste buds

Cook Quinoa according to package directions

While the quinoa is cooking, cook the sweet potato your favorite way...wrapped in plastic in the microwave, boiled on the stove, or cooked in the oven.

Chop the Onion and sautee on the stove until translucent and brownish

Let all the ingredients cool if you are wanting a cool dish, if not continue to the next step.

Combine cooked quinoa, cooked sweet potato, sauteed onion, chopped almonds and spices in a bowl.

Serve and enjoy!


Thursday, April 19, 2012

Sweet Potato and Avocado Panini


Aaaahhhhh!!!!  More sweet potatoes and I love them and they are so simple, especially when you cook them in the microwave.  It has been a few crazy days, and I knew that I would need something easy to go to...hence, cook 1 sweet potato for different meals, and you have toms to go around.  So, to get to the point, because this really is just to good to wait for a long story!

Sweet Potato and Avocado Panini

1 Medium Sweet Potato
1/4 Onion sliced
1/4 Avocado sliced
2 Slices of your favorite bread
3 slices Mozzarella Cheese
Oil for sauteing Onion

Wrap the Sweet Potato in plastic wrap and cook in the microwave for 6-8 minutes or until soft.

While the Sweet Potato is cooking, you can cut and prepare the Onion, Avocado and Cheese.


In a small pan, heat oil and place in Onion.  Sautee until the onion turns translucent (I actually used my 'panini' press, which is actually a waffle iron to 'sautee' the onions...super simple and one less thing to clean up)

While the onions and sweet potato are cooking, slice the avocado and cheese.  Place to the side.

Once the Sweet Potato is done, remove from the microwave (caution, will be very hot) and peel and slice.

Remove the onions from the pan or panini maker.


One one slice of bread, place the sliced sweet potato, avocado, grilled onions and cheese.  Place the other piece of sliced bread on top.


Place into panini press and cook until golden brown.

Remove, cut in half and enjoy by itself or with a side of salad if you are looking to add more greens.

Saturday, April 14, 2012

Sweet Potatoes and Broccoli


I was going to start out by saying that sweet potatoes might be one of my favorite foods, but then that would not do justice to watermelon (which is my #1 fav food), popcorn, avocados, or really anything else that I say is one of my favorite foods.  I really think I like most foods...not too picky, I really just love it all, especially when it is on sale at the grocery store...I think that is really determines my new favorite food....hence this time it is sweet potatoes.  While this is an odd combo of food, it is actually very delicious and oh so simple to prepare, so versatile and great for you with a wonderful and well, sweet taste!

Serves 2
Sweet Potatoes and Broccoli

1 C. Broccoli chopped to the size you desire...I made mine bite size
1 medium Sweet Potato
1/4 t. Lemon Pepper
1/4 C. Slivered Almonds
Butter to grease pan


Melt butter in a pan on medium heat.  Once the butter has melted, place the broccoli in the pan.  Cook, stirring occasionally until the broccoli is tender but still retains a crunch.

While the broccoli is cooking, prepare your sweet potato.  Wash, make small slices through the sweet potato and wrap in plastic wrap or wax paper.  Microwave for 5-7 minutes or until tender depending on the size of the potato and the power of your microwave.  (If you have more time to cook your sweet potato, you can of course boil your sweet potato in a pot on your stove, but it will take more than the 5-7 minutes in the microwave.)

Once the sweet potato is cooked, remove, peel, and slice into 1/2 inch cubes.

Once the broccoli is crispy/tender, add the lemon pepper.  Stir to coat thoroughly.


Add the slivered almonds and cubed sweet potatoes.  Stir, cover and cook for 1-2 minutes to combine flavors.

Serve and enjoy!

Friday, April 13, 2012

Easy and Quick Mac n Cheese with Broccoli and White Beans

As always, I am looking for ways to eat more vegetables.  However, if you have not noticed, I do love by breads and carbs, including a good does of the wonderful mac n cheese.  But as you can see, slight problem with that dish...no good for you fiber or veggies (especially if you use boxed mac n cheese that do not come with the whole grain pasta).  So, I slightly fixed that problem with this delicious and very easy recipe.

This idea sprang up when I had gotten home from rock climbing and was super hungry and knew I needed something healthy as well as a healthy lunch for work the next day.  This was the perfect mix to replace the nutrients and food that I had lost while climbing.  It also made enough for multiple servings and is even delicious cold out of the refrigerator or heated up later.

Easy and Quick Mac n Cheese with Broccoli and White Beans

1 box of your favorite Mac n Cheese (I used Aunt Annie's White Shells and Cheddar)
1 Can of White Beans
1 C. Fresh Broccoli cut into pieces
1/4 C. Water
1/4 t. Lemon Pepper

Prepare your Mac n Cheese according to package directions.


While the pasta is cooking, in a separate pan, add the Fresh Broccoli, can of White Beans, Lemon Pepper and Water.
Cook on medium heat stirring occasionally.


Once the Mac n Cheese is prepared according to package directions, add the Broccoli/Bean mixture and stir until thoroughly mixed.


Pour into a bowl or your favorite dish and enjoy!

P.S. Next time I make this, I will ditch the Mac n Cheese box and just used some whole wheat pasta.  The mixture of beans, broccoli and spices made enough flavor where you do not need the cheesy flavor of the processed Mac n Cheese.  When the beans break down slightly when you cook them with the broccoli, they create a slightly creamy mixture that suffices for the cheesy part of the Mac n Cheese.  If you do want the added benefits of the cheese with the calcium and protein, you could add a bit of Parmesan cheese after the pasta broccoli mix has been put into the bowl.

Spicy Asian Cucumber Salad


Cucumbers were on sale the other day, so what did I do, buy far too many to eat by themselves, in sushi, or in a traditional salad, so I was of course forced to find another way to enjoy so many cucumbers.  What better way that with some spices and seasonings!

Spicy Asian Cucumber Salad

1 Cucumber Sliced
1/2 C. Seasoned Rice Vinegar
2 T. Water
1/2 T. Sugar
1/2 T. Soy Sauce
1 t. sesame oil (I used regular cooking oil that I had laying around the kitchen)
1 T. sesame seeds (I did not have any, so obviously I did not use them)
2 Fresh Chili peppers or anything else spicy that you would like to add to the mixture (optional)

In a pie pan, combine Rice Vinegar, Water, Sugar, Soy Sauce, and Sesame Oil.  Mix thoroughly.


In the pie pan, add sliced cucumbers and toss until the cucumbers are thoroughly coated with the mixture.  Add the fresh chili peppers.  Refridgerate for 1 hour to let the spices soak into the cucumbers.  Remove from the refridgerator.  Add the Sesame Seeds and toss to evenly coat.


Enjoy!

Chai Tea Cookies


I love chai tea, so what could be better than adding it to cookies...well, not much, considering these were super delicious and super healthy...especially by a cookie standard!  (My dog even agreed that they were delicious...he might have stolen one!)  Any ways, these were baked on a night of deliciousness and craftiness (chai cookies, beer bread and button bracelets).

Chai Tea Cookies

2 3/4 C. Flour
1 t. Baking Soda
1/2 t. Baking Powder
1/2 t. Salt
3/4 C. Sugar
1/2 C. Butter
1/2 C. Applesauce
1 Egg
1/2 t. Vanilla extract
4 T. Chai Concentrate (I used the Tazo Chai tea concentrate that you can get at Starbucks seeing as I work there)
1/4 t. Ground Pepper

Preheat oven to 350 F.

In a large bowl combine all ingredients and stir until thoroughly mixed.

Drop about 1 1/2 T. of cookie batter on pre-greased cookie sheet about 1-2 inches apart.

Cook for 7-10 minutes or until cookies are lightly brown.

Remove from oven and place on cooling rack.  Enjoy!

P.S. Your cookie will come out slightly crunchier and most likely browner than mine because I used all applesauce instead of the applesauce/butter mixture that is recommended.  If you use all applesauce they will come out more like round pieces of bread (though still very delicious, but not as cookie like).

Wednesday, March 28, 2012

Quick and Easy Granola Bars


It is such a lovely day outside, I almost feel guilty sitting here at noon typing on my computer, but I did just get finished with the Incline in Colorado Springs (check out this site if you have no idea what I am talking about... http://www.manitouincline.com/).  

Manitou Incline


Afterwards, I managed to eat my last homemade granola bar, so I figured what better way to relax than to cook up some more to use for the next few weeks on the incline...my goal is once per week.  I am not sure what my time was today (my watch is broken as is my cell phone), but last week it was 48 minutes, and this week I 'ran' some of the sections.  Needless to say, I was a bit hungry and now attempting to rest a bit.  So, here goes on the granola bars...the batter tasted amazingly delicious, and the bars tasted even better! (Yes, I had a granola bar after the incline, and one while cooking...you can't expect me to post something without actually trying it can you?!?!

And while I am at it, my dog is in a sleeping dog photo contest that goes until the end of March, 2012...please vote for him!  You know he is absolutely adorable!
http://gazette.upickem.net/engine/Details.aspx?p=V&c=51777&s=18313640


Quick and Easy Granola Bars

3 C. Rolled Oats
1/4 C. Flax Seeds
1/2 C. Honey (bit more if you like things sweeter)
1/2 C. Protein Powder of your choice
1 1/2 C. Powdered Milk (or soy powder if you are going dairy free)
1 T. Ground Cinnamon
1/4 t. Ground Ginger
1 Egg
1 T. Lemon Juice in a half cup measuring cup filled the rest of the way with water (or 1/2 C. of your favorite juice)
1 C. mix of Almonds, Sunflower Seeds, Almonds, Raisins and Craisins (or any mix you desire)
1/2 C. Applesauce

Preheat oven to 350 F


In a large mixing bowl combine all ingredients and stir thoroughly.  If the mixture is too runny, add more oats until almost the texture of cookie dough.


Grease a 9x13 baking pan and pour in batter.  Place in oven and cook for 15-20 minutes or until golden brown.

Remove from oven and let cool for 20 minutes before enjoying!


After the bars have completely cooled, you can cut them up in squares freeze them.  Just separate the squares with wax paper, aluminum foil and then place in a freezable container to later be removed and enjoyed in the future!  Even if you don't plan on freezing them, I would probably store them in the fridge just to be on the safe side...food poisoning kinda ruins playing outside...just sayin'

Inspiration courtesy of: http://www.ehow.com/how_4470045_energy-barseasy-healthy-homemade.html